
extreme color cast photoshop tumblr tutorial When it comes to creating a visually striking aesthetic, Tumblr has long been a platform where bold visuals and extreme color edits thrive. One of the most iconic visual effects that emerged from the Tumblr aesthetic era is the extreme color cast. This vibrant and often surreal color grading technique involves pushing the hues of an image to create a dramatic, often nostalgic or dreamlike atmosphere. In this Photoshop tutorial, we will dive into how to recreate the Tumblr-style extreme color cast effect using Adobe Photoshop, with step-by-step guidance and professional tips along the way.
What is the extreme color cast Photoshop Tumblr tutorial?
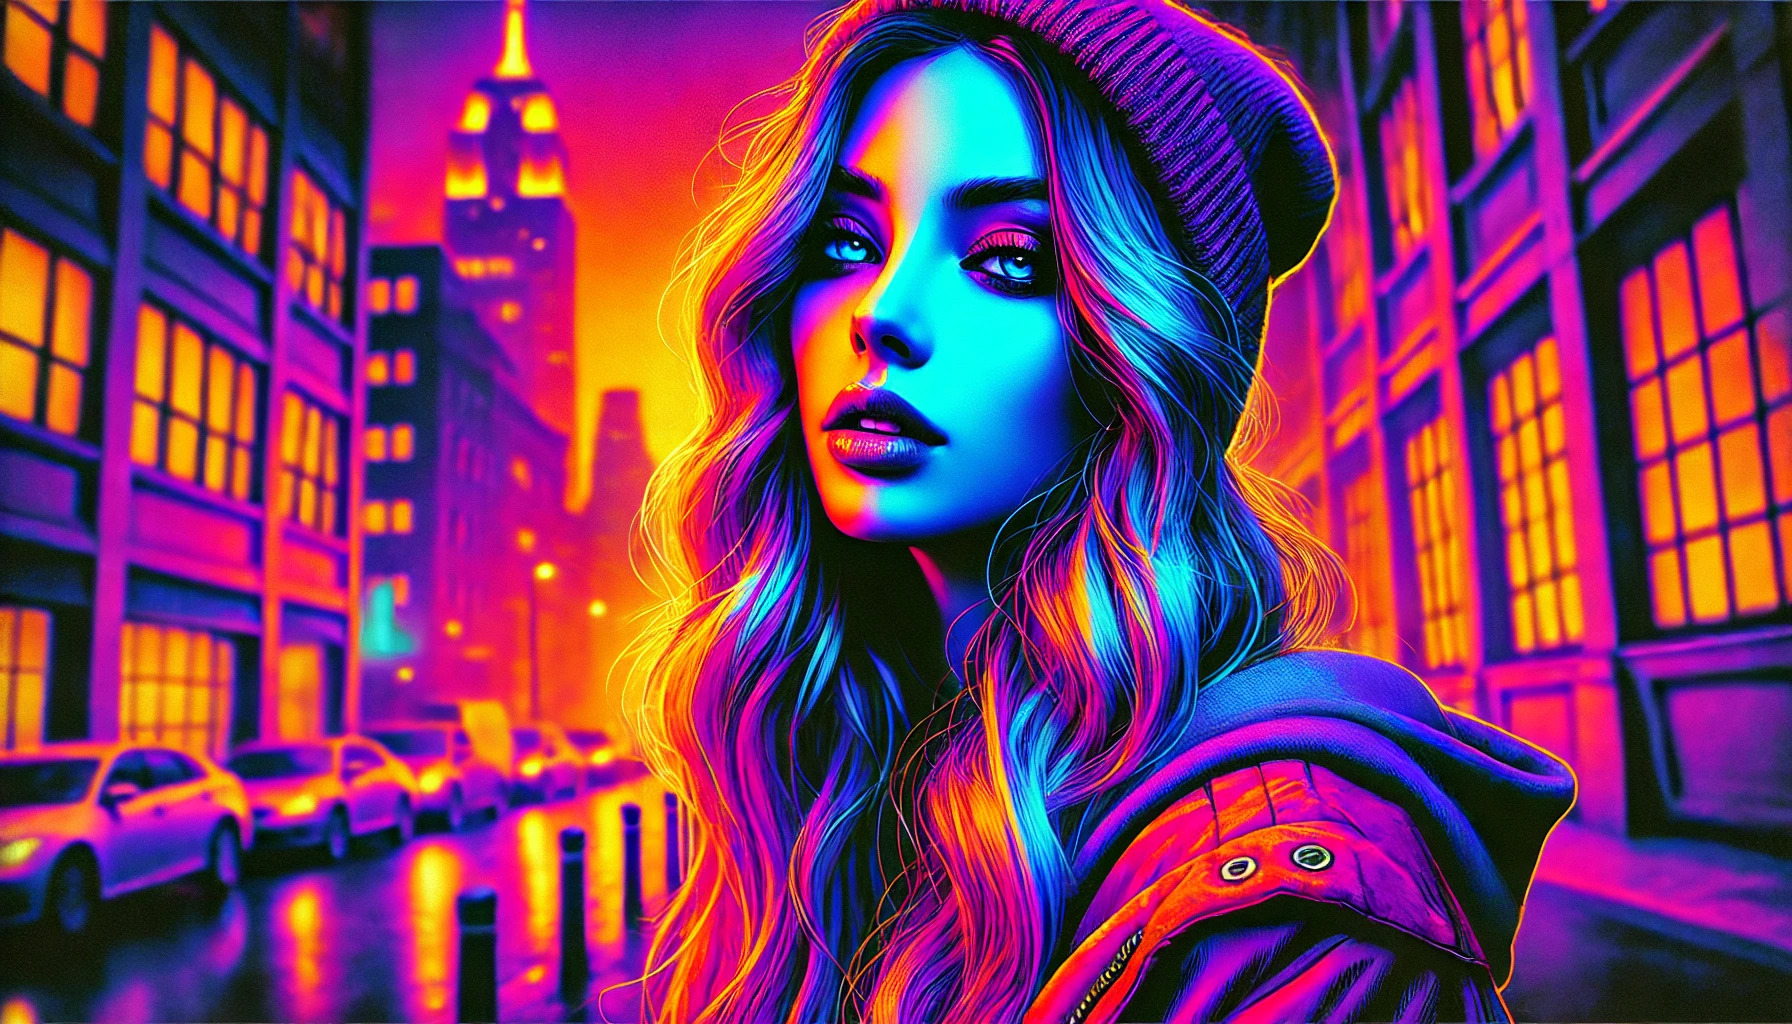
An extreme color cast is a strong overlay of a specific hue or set of hues that affects the entire image. Unlike subtle color grading used in films or photography for realism, extreme color casts are intentionally bold and unnatural. Think bright purples, neon blues, fiery oranges, or surreal greens that drench the photo in a specific mood. These edits became popular across Tumblr blogs during the 2010s, particularly in vaporwave, soft grunge, and indie aesthetics.
Also Read: Understanding the pcr2 1 eeprom decoder: A Complete Guide
Why Use Photoshop for This Effect?
Photoshop remains the go-to software for creatives who want complete control over their visual edits. With adjustment layers, blending modes, selective color tools, and masking, Photoshop offers the precision needed to execute a perfect extreme color cast. Whether you’re new to photo editing or a seasoned pro, Photoshop allows you to customize your edits to match your unique Tumblr-inspired vision.
Getting Started: Preparing Your Image
Before applying any color effects, it’s important to choose the right image. High-contrast photos with defined subjects work best, especially portraits, landscapes, or urban scenes. Open your chosen image in Photoshop. Always duplicate your background layer first to preserve the original image. To do this, right-click the background layer and select “Duplicate Layer.”
Next, adjust the brightness and contrast if needed. Go to Image > Adjustments > Brightness/Contrast and tweak the levels so your image is well lit. This is especially important because extreme color casts often rely on contrast to shine through.
Step 1: Add a Gradient Map Layer
One of the most effective ways to create a dramatic color cast is by using a Gradient Map adjustment layer. Click on the adjustment layer icon at the bottom of the Layers panel and choose “Gradient Map.” Photoshop will apply a gradient to your image based on the light and dark values.
Now, click the gradient bar to open the Gradient Editor. This is where the magic begins. Choose bold and contrasting colors to set your tone. A popular Tumblr-style combo includes deep purple for shadows and electric cyan for highlights. You can create your own gradient or explore downloadable packs from Tumblr creators.
Once you’ve chosen your colors, set the blending mode of the Gradient Map layer to “Soft Light” or “Overlay.” This will blend the gradient with your original image and create a more natural integration. Adjust the opacity if the effect is too strong.
Step 2: Use Selective Color for Precision
To further refine your color cast, use a selective color adjustment layer. This tool allows you to adjust specific color ranges within the image. Go to the adjustment layer icon and choose “Selective Color.”
Focus on manipulating the “Neutrals,” “Whites,” and “Blacks” to dramatically change the tones across your image. Adding cyan to the whites, increasing magenta in neutrals, or pulling yellow from the blacks can intensify the extreme cast.
Don’t be afraid to experiment. The goal is to exaggerate the tones to match your aesthetic, not to preserve natural color integrity.
Step 3: Add a Curves Layer for Drama
The Curves tool is ideal for increasing contrast and creating that sharp Tumblr vibe. Add a Curves adjustment layer and create a slight “S” shape to boost contrast. Pull down the shadows and lift the highlights.
For added surrealism, work with the individual red, green, and blue channels. For example, dragging the red curve upward in the highlights adds warmth, while dragging the blue curve down in the shadows adds a moody teal tone.
This step solidifies your image’s tone and pushes it into the Tumblr aesthetic territory.
Step 4: Create a Color Balance Layer
A color balance adjustment layer lets you easily tweak the overall tint of the image. Go to Layer > New Adjustment Layer > Color Balance. Adjust the sliders for shadows, midtones, and highlights to push your chosen hues even further.
If you want that deep magenta and blue mix popular in early Tumblr visuals, increase the magenta and blue sliders in both shadows and midtones. Play around with combinations like green shadows with yellow highlights for a lo-fi indie effect.
Step 5: Apply a Photo Filter Layer (Optional)
For a finishing touch, you can add a photo filter adjustment layer. This layer adds a subtle tint that overlays the whole image. Choose a warm or cool tone to enhance the mood. This is also a great way to unify your image if your color grading starts to feel too chaotic.
Try a deep purple or teal photo filter with low density and see how it ties everything together.
Step 6: Add Texture and Grain
To truly embrace the Tumblr aesthetic, consider adding texture or grain. This can be done by creating a new layer, filling it with 50% gray, and adding noise (Filter > Noise > Add Noise). Set the layer’s blending mode to “Overlay” and reduce the opacity until it looks natural.
You can also explore using overlays like dust, scratches, or light leaks to add a vintage, film-inspired finish to your extreme color cast.
Step 7: Exporting for Tumblr
Once you’re happy with your edit, it’s time to export. Go to File > Export > Save for Web. Tumblr prefers JPEG files under 10MB for faster loading. Use an sRGB color profile and optimize the image quality around 80-90% to maintain visual fidelity without a heavy file size.
Don’t forget to watermark your work or include a Tumblr URL in the corner if you’re sharing original content.
Tips for Maintaining Aesthetic Consistency
If you’re planning to build a theme or portfolio on Tumblr, try to maintain consistency in your editing style. Save your gradient maps and color settings as presets so you can reuse them across future images. Keeping a consistent color palette helps build a recognizable personal brand, which is key on Tumblr and social platforms. extreme color cast photoshop tumblr tutorial
You can also create Photoshop actions to automate the extreme color cast process. This saves time and ensures your images stay cohesive.
Why Tumblr Aesthetics Are Making a Comeback
In recent years, there’s been a resurgence of interest in Tumblr-style visuals. As younger audiences seek nostalgic, expressive, and DIY aesthetics, extreme color cast edits fit perfectly into this trend. From Instagram reels to TikTok slideshows, these visuals are being repurposed on modern platforms, proving that the Tumblr aesthetic still has cultural weight in the digital age.
Whether you’re curating a moodboard, building a blog, or just experimenting with your visual identity, learning how to create extreme color casts in Photoshop connects you to a rich and expressive digital art culture.
Conclusion
Extreme color cast Photoshop Tumblr tutorials are a bold and creative way to transform ordinary photos into mesmerizing visual statements. This Tumblr-style Photoshop tutorial offers a step-by-step process for achieving those dreamlike, hyper-colored looks that defined a generation of digital art. By mastering tools like Gradient Maps, Selective Color, Curves, and Color Balance, you can create your own aesthetic universe and share it with the world.
Now that you know how to bring the Tumblr extreme color cast to life in Photoshop, dive into your gallery, pick a photo, and start creating. Your followers are waiting to double-tap on that neon-soaked masterpiece.
FAQs
What is the best image type for extreme color cast edits in Photoshop?
Images with high contrast, clear subjects, and rich lighting work best. Portraits, cityscapes, and night photography are especially effective for color-heavy edits.
Can I use this tutorial on Photoshop Elements or mobile versions?
While this tutorial is designed for the full version of Adobe Photoshop, some steps like gradient mapping and color balance can be approximated in Photoshop Elements or mobile apps, though with more limited control.
What are some common Tumblr color combinations for this effect?
Popular combos include purple and cyan, magenta and blue, orange and teal, and even green and pink for surreal aesthetics. Don’t be afraid to create your own signature mix.
How do I keep my edits consistent across multiple photos?
Save your adjustment layers as presets or Photoshop actions. This ensures every photo follows the same aesthetic, which is essential for Tumblr blogs or digital portfolios.
Where can I find gradient map presets for Tumblr edits?
Many creators share free gradient presets on Tumblr, DeviantArt, or design forums. Always check licensing if you plan to use them commercially.
Do I need a tablet for this Photoshop tutorial?
No, a tablet is not required. A mouse or trackpad will work fine for creating extreme color cast effects in Photoshop.